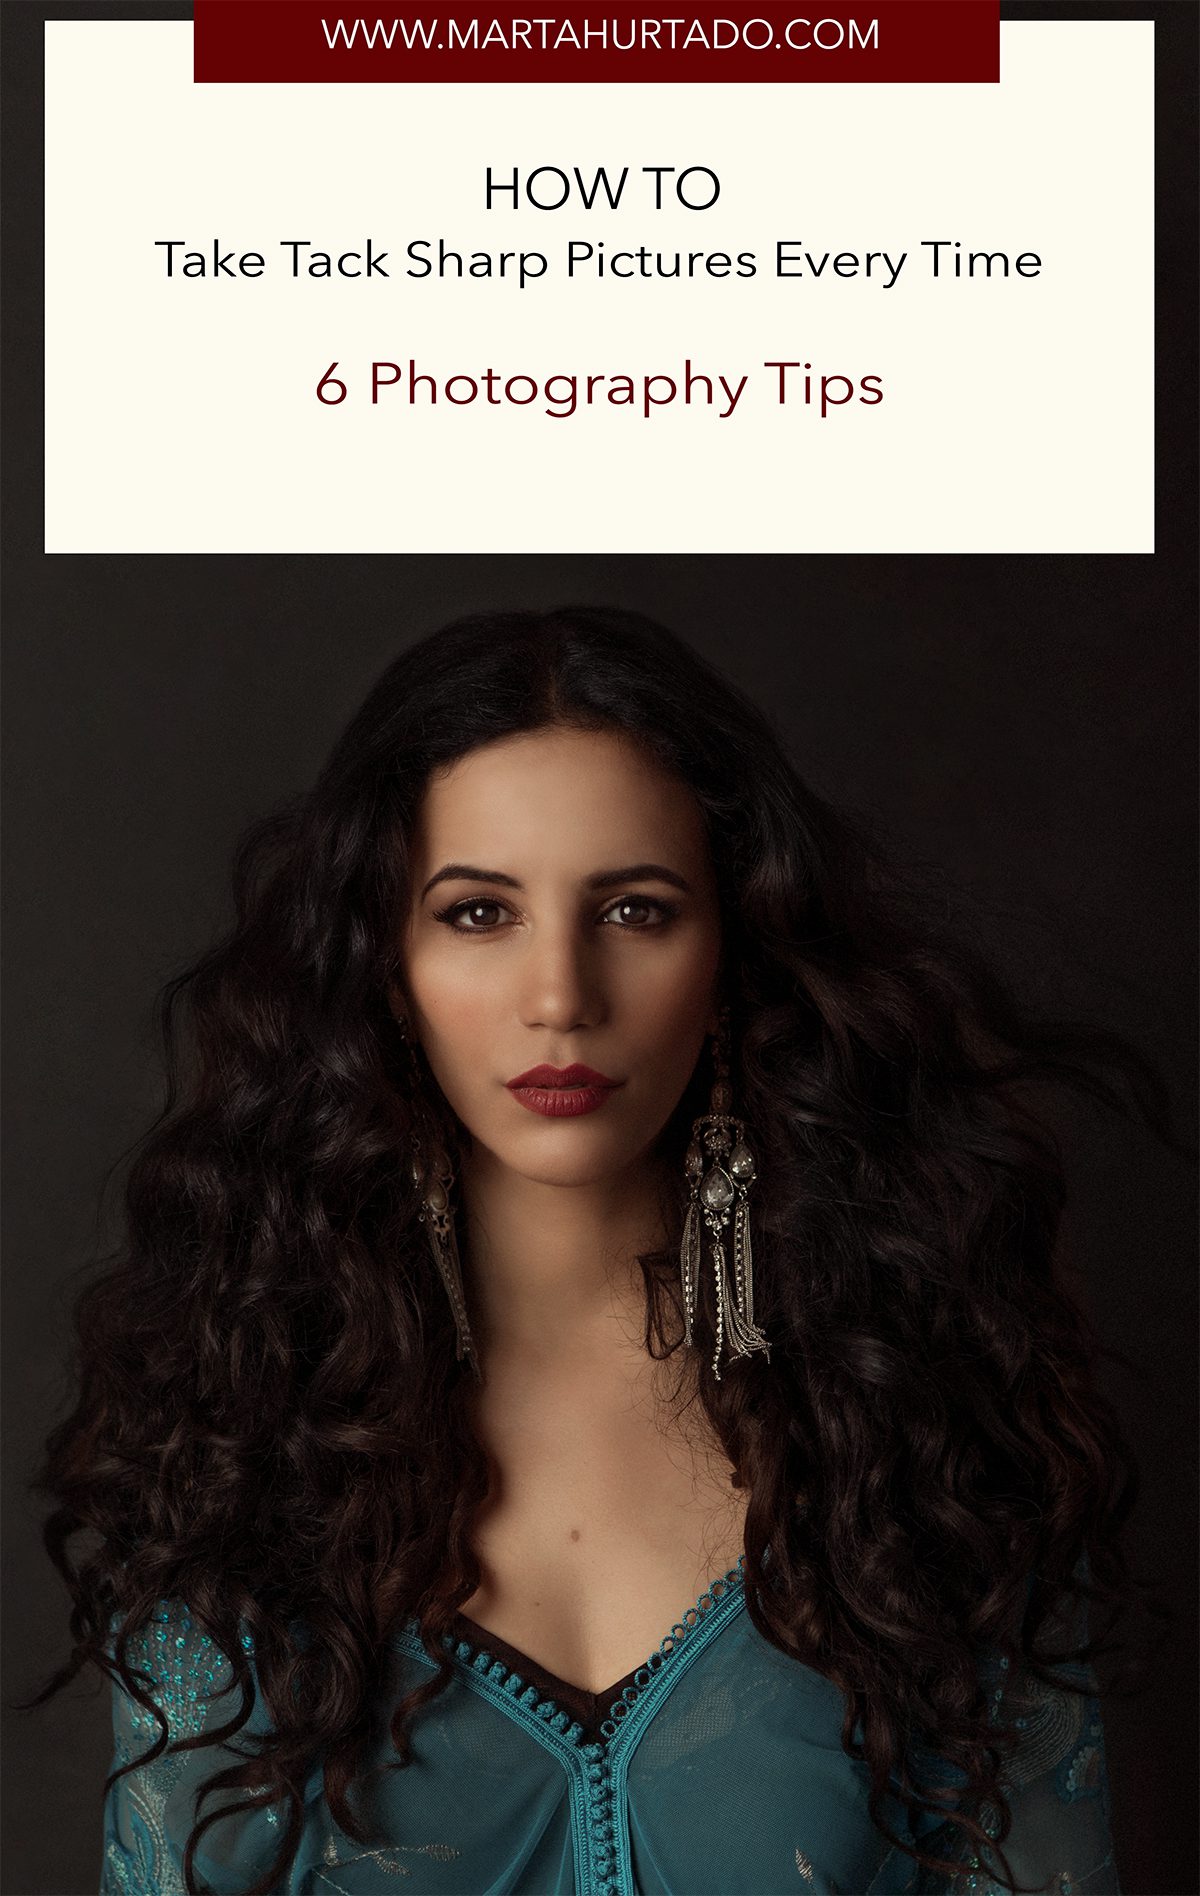
In photography, the term “tack sharp” describes an image which shows the main subject in sharp focus and no blurring. Achieving this level of sharpness is one of the keys to a truly eye-catching picture.
Taking tack sharp photos is all about reducing camera shake to an absolute minimum and there are many different ways you can achieve this. Some of the tips apply to all situations, while others can only be used in certain circumstances, but each one helps reduce the amount of camera shake by a small fraction. Getting to know those tips, and knowing when to use which specific method, is the key to getting sharper shots.
6 PHOTOGRAPHY TIPS ON HOW TO TAKE TACK SHARP PICTURES EVERY TIME
Here’s a list of 6 basic things to think about when shooting to get sharp images every time.
1. Know your camera | Basic settings
2. Image stabilisation
3. Hold your camera well
4. Get a tripod
5. Squeeze the shutter button gently
6. Use an external remote control or use a build in timer
1. Know your camera | Basic settings
Shutter Speed
One of the first things to think about in your quest for sharp images is the shutter speed that you select. The faster your shutter speed, the less impact camera shake will have and the more you’ll freeze any movement in your shot. As a result you reduce the likelihood of two of the main types of blur, subject movement and the camera movement.
Here are the ‘rules’ for handheld shutter speeds:
Choose a shutter speed with a denominator that is larger than the focal length of the lens:
- if you have a lens that is 50mm in length don’t shoot any slower than 1/60th of a second
- if you have a lens with a 85mm focal length shoot at 1/100th – 125th of a second or faster
- if you are shooting with a lens of 200mm shoot at 1/250th of a second or faster
Keep in mind that the faster your shutter speed is the larger you’ll need to make your aperture to compensate. This will also mean that you’ll have a smaller depth of field, which in turn will make focusing more of a challenge and might add a grain feeling to your photos.
Aperture
Aperture impacts the depth of field (the zone that is in focus) in your images. If for example your aperture will be set at f/20, this will increase the depth of field. This means that the zone that will be in focus will include both close and distant objects. If however you will set your aperture at f/2.8, your chosen subject should be in focus while the background should be getting more out of focus, and slightly bury.
Keep in mind that the smaller your aperture the longer your shutter speed will need to be. You will have to be more steady. This will also make photographing moving subjects more difficult.
ISO
The third element of the exposure triangle is ISO which has a direct impact upon the noisiness of your shots. Choose a larger ISO and you’ll be able to use faster shutter speed and smaller aperture (which as we’ve seen help with sharpness) but you’ll suffer by increasing the noise of your shots. Depending on your camera, and how large you want to print your images. But in general, you can probably get away with using ISO of up to 1600, 3200 or even higher on some cameras without too much noise but for pin sharp images keep the ISO as low as possible.
Focus
The best technique to use, when aiming for sharp images is using manual focusing. As the ‘Auto Focus’ in your camera can do the job for you, it will not always get it right. Make sure to visually check what part of the image is in focus before hitting the shutter. The best way to guarantee the perfect focus is switching to manual focus mode. This is particularly important if you’re shooting with a large aperture (small depth of field) where even being slightly out of focus can result in your subject being noticeably out of focus.
Most modern cameras have a range of focus modes you can choose to shoot in. Make sure that whatever function you choose, it’s the one that will give you the most control and choice, and the highest chances of getting tack sharp images every time.
2. Image stabilisation
Image Stabilization (IS) allows photographers to flip a switch on their lens and handhold their cameras in lower light conditions, using longer shutter speeds without the problem of Camera Shake. With my Canon lenses I notices that I can use slower shutter speeds by 2-3 stops when I use IS.
Image Stabilization is a great feature and is in my opinion well worth paying the extra euro for, especially if you shoot a lot in lower natural light conditions, or if you want to have the option to shoot at any time during the day and you might not have your tripod always with you.
Having said this there is one time when you should definitely switch IS off because it will do more harm than good to your photos. When you’re using a Tripod make sure that this option is off. As Image Stabilization, and vibration reduction lenses look for vibrations in your camera in order to reduce it. However if they don’t find any, like when you are using a Tripod, they actually can cause it.
Canon’s expert, Chuck Westfall explained:
“The IS mechanism operates by correcting shake. When there is no shake, or when the level of shake is below the threshold of the system’s detection capability, use of the IS feature may actually *add* unwanted blur to the photograph, therefore you should shut it off in this situation. Remember that the IS lens group is normally locked into place. When the IS function is active, the IS lens group is unlocked so it can be moved by the electromagnetic coil surrounding the elements. When there’s not enough motion for the IS system to detect, the result can sometimes be a sort of electronic ‘feedback loop,’ somewhat analogous to the ringing noise of an audio feedback loop we’re all familiar with. As a result, the IS lens group might move while the lens is on a tripod, unless the IS function is switched off and the IS lens group is locked into place.”
3. Hold your camera well
A lot of blur in the photos is a direct result of camera shake, the movement of your camera at the time when your shutter is open. While the best way to tackle camera shake is to use a Tripod, there are times when using a tripod can be impractical or you simply might not have it with you, and you might need to shoot while holding your camera.
How can you improve it?
When hand-holding your camera, the biggest source of vibration and movement is your body, so try to hold it as still as possible. Take a good, well grounded pose. Make yourself as stable as possible. Use both hands, tuck your arms into your sides or lean up against a wall or tree for some extra support. Keep the camera close to your body whenever possible. When shooting, even your breathing can cause tiny movements in the camera, so try to breathe slowly and gently, or hold your breath while releasing the button (I always do it), and press the shutter button in between breaths when you’re relatively still.
4. Get a tripod
Tripods are the way to go if you want to eliminate camera shake. While not always practical, the result you’ll get when you do go to the effort of caring one around can be well worth it. Plus it might encourage you to actually take more pictures.
NOTE: Make your tripod sturdy
The purpose of a tripod is to hold your camera as still as possible, so you need to make sure that your tripod is nice and sturdy. Also, avoid extending the center column and legs of your tripod more than is necessary. The taller you make your tripod, the more it will wobble, and the harder it’ll be to get pin sharp images.
If your tripod has a hook underneath, hang something off it to provide extra stability.
TIP: Use your bag or anything else you might carry with you. But many professionals carry an empty “rock bag”, (but you can use any empty bag) that they can fill with stones to give a good, heavy weight which will hold the tripod still even in strong winds.
If you don’t have a Tripod with you but you could use one, simply look around!
We’re surrounded by objects and surfaces that make perfect natural tripods. Put your camera on a wall, a chair, on the side of a window, or wedge your lens between the wires of a fence. It will provide a bit more stability, holding your camera still, and it will reduce blurring in your photos. So be inventive and carefully look around. You might not always get the shot you wanted but you might be surprise where your creativity will get you, and the shots you will get could be simply amazing. You will never know if you will not try.
5. Squeeze the shutter button gently
When pressing the shutter button, do so as gently as you can. Make sure your finger is in contact with the button to begin with, rather than hovering over it. Gradually squeeze down on it, try not to push it quickly. Once the button is down, hold your finger there until the camera has finished taking the shot, and just then release it.
6. Use an external remote control or use a build in timer
Pressing the shutter button on your camera can cause minute shaking. You’d think this would be too small to make a difference, but it can be noticeable in the final photo. A cable release or remote control is an inexpensive way of avoiding this problem. Or use your camera’s self-timer, 2 seconds is plenty of time for any vibrations caused by touching the shutter button to be avoided. Unless you are taking a self-portrait… then you might like to set it for 10 seconds, to give yourself some time to take the pose.
BONUS TIPS | YOUR PHOTOGRAPHY GEAR
Tip #1. Invest in good lenses
This one is for DSLR owners. If you have the budget for it invest in good quality lenses as they can have a major impact on the sharpness of your images. Know your needs and invest and grow your lens collection with time.
At this moment I’m using: 50mm f/1.8 lens, 85mm f/1.8 lens and 24-70mm f/2.8 zoom lens.
Know your lenses sweet spots
Lenses have spots in their aperture ranges that are sharper than others. In many cases this ‘sweet spot’ is 1 or 2 stops from the maximum aperture. So instead of shooting with your lens wide open (ie where the numbers are smallest) pull it back a stop or two and you might find you get a little more clarity in your shots.
Tip #2. Clean your equipment
Keep your camera and your lenses clean. This will make sure that you’ll eliminate the smudges, dust and grime that can impact your shots. Also don’t forget to use sensor cleaning option in your camera. It’s a wonderful thing if you have a DSLR as getting dust on it can produce noticeable blotches in your end images.
Achieving tack sharp images isn’t impossible, but it does involve doing as many small things as you can remember at the time of shooting. Each might only make a tiny difference, but the cumulative effect will result all in all in sharper, better quality photographs.
Let me know if those tips have helped you! Use the comment section below to post links to examples or ask any questions you may have. Be sure to follow me on Instagram @martahurtadophotography, I can answer questions there as well.
With Love,
Marta
Stay connected!
Website: martahurtado.com | Facebook: Marta Hurtado Photography
Google +: Marta Hurtado Photography | Pinterest: pinterest.com/hurtadomarta/
Instagram: instagram.com/martahurtadophotography
Twitter: twitter.com/m_sunshine